Showing posts with label Stack The Deck Binding Technique. Show all posts

Tuesday, 5 May 2015

Mini Album

Album skończyłam we wrześniu, w zeszłym roku... Jest wielkości 6in /6in. Ma sześć stron - kieszonek. W kieszonkach są proste tagi na więcej zdjęć.
Na okładce z przodu i z tyłu dodałam podwójny rząd koronki.

I have made this mini album in September last year. It is 6in / 6in. It has six pocket pages with simple tags for photos.
I have added to the front and back two rows of lace.


Podobnie jak w poprzednich albumach po prawej zostawiłam miejsce na większe zdjęcie a po lewej dodałam kieszonki i koperty.

I have made similar pages like in previous mini albums. I left the right hand side pages for large photo adding just a tag in the corner. On left hand side pages I added pockets, envelopes and fun folded folder.


Gdzie niegdzie za tagami ozdabiającymi strony po prawej jest założony tag albo mini folder na zapiski i zdjęcia (mini zdjęcia :) Różyczki tzw zwijane (z papieru czerpanego). Moje z wykrojnika Rolled Rose La La Land.

There are, here and there, tiny folders and tags for photos and jurnaling. Rolled roses I made from handmade paper using Rolled Rose La La Land die.


Koperta po lewej to tzw expanding envelope, którą zrobiłam z trzech gotowych kopert. Dodałam zamknięcie na magnesik. 

The expending envelope to the left I made from three envelopes. I added a flap with a tiny magnet closure.


Rower na kopercie to stempel Crafty Individuals CI-417.

The bicycle on the envelope is a Crafty Individuals stamp CI-417.


Na większym folderze jest min. mały bilet z zestawu stempli Crafty Individuals CI-239. Jest on jeszcze w innych miejscach (niewidocznych na zdjęciach :-)

There is, on the bigger folder, a little ticket from Crafty Individuals CI-239. The ticket is also in other places, which are not on photos.


Tutaj po lewej jest mały folder, który otwiera się w taki zakręcony sposób. Zawsze podobały one mi się w albumach (albo jako samodzielny album). Orginalny jest złożony z dwóch kopert DL. Mój zrobiłam z kartonu wg wskazówek Loretty - klik (Loretta pokazuje dwa mini foldery, ten zakręcony to drugi).

There is, to the left, little fun folded folder. I have seen those made from two DL envelopes. Mine is made of card stock following Loretta's video tutorial - click (there are two folders in this video).


Na tm zdjęciu próbowałam pokazać jak się on rozkłada... ;-) Na filmiku Loretty widać wyraźniej :-) Od siebie zrobiłam kieszonki w dwóch miejscach.

On this crazy photo I wanted to show this fun folded folder ;-) The best is to watch Loretta's tutorial :-) I have added two extra pockets inside.


Tutaj po prawej jest koperta (również expanding envelope). Tę kopertę przygotowałam z kartonu. Również zamyka się na magnesik.

There is, to the right, another expanding envelope. This one I made from card stock. It closures on tiny magnet.


Album zrobiłam z kolekcji Prima Something Blue (mały bloczek) ale zakryłam lub nakleiłam małe 'coś' na każdy napis, obrazek, który kojarzył się ze ślubem. :-) Tagi to wykrojnik Large Nested Tag Die-lights , ten super mini telefon, piórko i kałamarz to też Die-Lights Staying in Touch. Malutkie tagi Wplus9 Timeless Tags. Maciupkie ptaszki to MB Resting Birds.

I have made my mini using Prima Something Blue collection (pad). I have covered with images anything about the wedding ;-) Tags on every page are from Die-Lights Large Nesting Tag. Also little cute phone, feather and inkwell are from Die-Lights Staying in Touch. Tiny tags are from Wplus9 Timeless Tags. I also added tiny birds here and there. Those are from MB Resting Birds.

Serdecznie pozdrawiam. Miłego wieczoru.
Thank you so much for stopping by. Have a nice evening.
Joanna

Friday, 14 November 2014

Grudniowniki / December Daily


Dwa świąteczne albumiki dla siostrzyczek. Albumy mają po dziewięć stron. Stronami są koperty kwadratowe (ok 6 1/4in).

Two December Daily style mini Christmas albums for two little sisters. Albums has nine envelope (6 1/4 in square) pages each.

✿✿✿

Na okładkach są shaker box'sy.

On the covers there are shaker boxes.


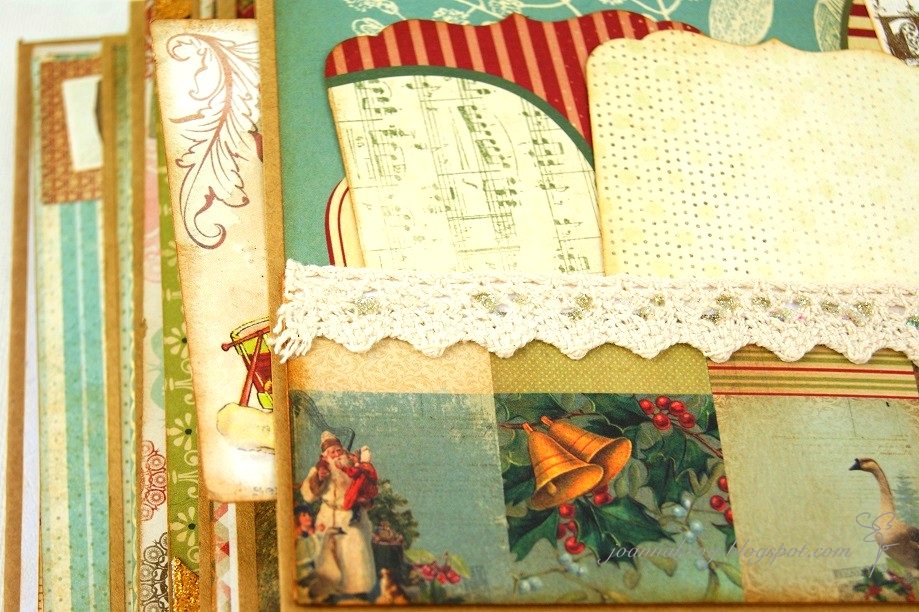
W albumach są tagi, mini książeczki i karty (w kieszonkach) na zdjęcia i zapiski. Wiele tagów można wyjąć albo przykleiłam tak, że zawsze można za nie coś włożyć.

There are in the albums lots of tags, mini books and photo mats (in he pockets) for photos and jurnaling. Most of the tags can be moved around the mini and almost all of the ones I glued down are glued just on the edges so it can be tag something underneath.


Do ozdobienia albumu użyłam również grafiki adventowe UKH. Dziękuję :) Na przykład tę skarpetkę i dni miesiąca. Oraz grafiki świąteczne (świąteczne karty) Prima (Prima FB).

To decorate the albums I have also used some UHK Christmas graphics. Thank you. There is eg this sock and days of the months. I also used so Prima Christmas post cards free printables (Prima FB).


Bałwankowi oczy i guziki wycięłam z czarnego brokatowego papieru. Mienią się jak węgielki :) Na szyji ma szalik z wełny, która tez delikatnie się mieni.

I have die cut snowman's eyes and the buttons with black glittered card so they are sparkle like real coals. It also has a little sparkly scarf :)


Choinkę (UHK) zostawiłam nie udekorowaną, tak aby dziewczynki mogły same ją ozdobić. Wycięłam kilka elementów do ozdoby i schowałam w kopertę. Jest ona w kieszonce na ostatniej stronie.

I have left Christmas tree undercoated as I wanted little girls to do it by themselves. I just die cut some sparkly elements to encourage the girls and put it in the little envelope which is in the pocket on the last page.


To są te elementy wycięte przeze mnie na zachętę:)

Here are those sparkly elements for decoration.


Jedna z kart z kieszonek.

One of the photo mats.


Na niektóre maty dodałam narożniki z papieru z brokatem. Po lewej, ta niebieska część się otwiera.

On some of the photo mats I added corners which I made of the glittered card stock. On the right hand side, the blue part is opening.


W tej części albumu w kieszonce zamieszkał Piernikowy Ludzik :)

In this part of the mini is a home for Gingerbread Man :)


Piernikowy Ludzik również czeka na dekoracje :)

I left it blank for girls to decorate maybe with some elements I prepared for them.


Tak tylko ułożyłam do zdjęcia :)

I just put it on for the photo how he could look like :)


Na koronkach w kilku miejscach dodałam brokat.

I have added some glitter on the laces too.


Tutaj po praej ponownie dolna część się otwiera.

Here also on the right hand side the bottom part is opening.


Przygotowałam również kartkę z szopką. Pierwszy raz kartkę typu pop-up :) W albumikach starałam się zostawiać miejsce nanotatki i na rózne różności jakie będą dziewczynki dodawać do albmów.

I hale also created little pop-up card. I left lots of room for notes and for adding all the little things the girls would like to add.


Białe gałązki wycięłam z białego brokatowego kartonu.

The little branches in the mini I die cut with white glitter card stock.


Po prawej jest choinka Crafty Individuals (również wyciełam ją z brokatowego kartonu). W kopercie (z takich kopert zrobiłam strony albumów) włożyłam listy dls dziewczynek z pomysłami jak uzupełnić świąteczne albumy.

There is, on the right Starry Christmas Tree by Crafty Individuals (I have also die cut it with glittered card stock). In the envelope (I used the same for pages) I put a letter for girls with some ideas how and what to add to Christmas mini albums.


Album przygotowałam z dwóch kolekcji świątecznych Kaisercraft.

I have made this mini album from two Kaisercraft Christmas collections.

✿✿✿

Kilka zdjęć drugiego albumiku :) Do tego albumiku użyłam papierów Prima Jubilee oraz kilka dodatków Keisercraft.

Here are some more photos of the second mini album. I have used Prima Jubilee collection together with Keisercraft Christmas collections.


✿✿✿

Grzbiet albumu zrobiłam łącząc ze sobą dwie techniki. Połączyłam technikę, którą nauczyłam się od My Sister Scrapper z techniką, o której przeczytałam na blogu Eleny. Połączyłam te dwie techniki i dodałam troszkę od siebie. Strony zrobiłam z kopert, nałożyłam je na łączniki stron (hidden hinge binding) tak jak pokazuje My Sister Scrapper ale sam mechanizm przygotowałam łacząc 10 elementów ze sobą tak jak pokazuje Elena tylko zamiast wklejać pomiędzy łączniki karty ja skleiłam łaczniki i nałożyłam na nie koperty. Łączniki, które były przy okładkach zrobiłam szerzej (3/8 in) i z jednej strony dłuższe (z tej do której doklejałam je potem do okładki). Pozostałe elementy łącznika bigowałam 1/4in. Dodatkowo też okleiłam wewnętrzny grzbiet (łącznik) papierem kraftowym, tak że jak grzbiet się uwypukla nie widać materiału (gazy) tylko widać papier kraftowy (cieniutki/pakowy). Chciałam alby albumiki miały więcej niż sześć stron dlatego zdecydowałam się na taki elastyczny grzbiet.

I just wanted to share the way I done the binding. I have mixed to techniques. I have mixed My Sister Scrapper technique with the one Elena is sharing on her blog (it is in Russian but easy to follow thanks to detailed photos). I wanted to create more pages than six (Stack The Deck Binding Technique) so I decided to create flexible spine with 9 pages. I used envelopes to create pages. I created the inside spine by gluing together 10 pieces (Elena is adding pages in between these elements). The one which meets the covers I scored 3/8in, the rest 1/4in. I have also made longer edges on the parts which meet the covers. I added pages (envelopes) on the inside spine like in the hidden hinge binding technique. I followed Ellena's tutorial to finish the outside spine (I just added some extra light kraft packing paper on the fabric on the inside spine so it looks tidy when the outside spine bends out. Hope it makes sense.


Serdecznie pozdrawiam i bardzo dziękuję za odwiedziny :)
Thank you so much for stopping by :)
Joanna
Related Posts Plugin for WordPress, Blogger...